With Orderhive, you can transfer stock of products from your warehouse to FBA warehouse and track it. With this feature, you can make sure your FBA warehouse never runs out of products that are in high demand and need quick replenishment.
Orderhive maintains 4 statuses of Stock transfer order - To Ship, Awaiting Receipt, Received, and Completed.
Note: You need to integrate Amazon FBA account with your Orderhive account for Inbound Shipment.
To transfer stock, please follow the below steps:
- Go to Transfers
- Click on to create a new FBA transfer.
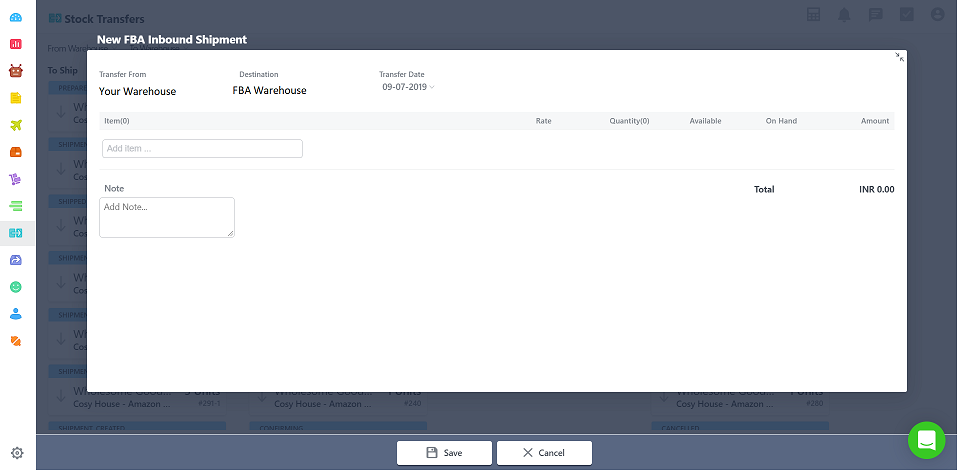
- This will open a window as shown in the above screenshot. Select the TRANSFER FROM warehouse and the DESTINATION (FBA) warehouse from the drop-down.
- Add items by searching through SKU or name or through scanning the barcode of the product. Make sure the SKU you are searching for should be already listed on the FBA store.
- Enter the quantity that is to be transferred. You can also add a NOTE for reference purposes.
- Click on SAVE to add the transfer in the system.
- Once the transfer is saved, it will show up in the TO SHIP column. In this stage, a transfer can be edited by double-clicking on the transfer and then clicking on EDIT. Once the transfer is marked as shipped, it cannot be edited.
- The stock transfer can also be Deleted, Cancelled or Printed.
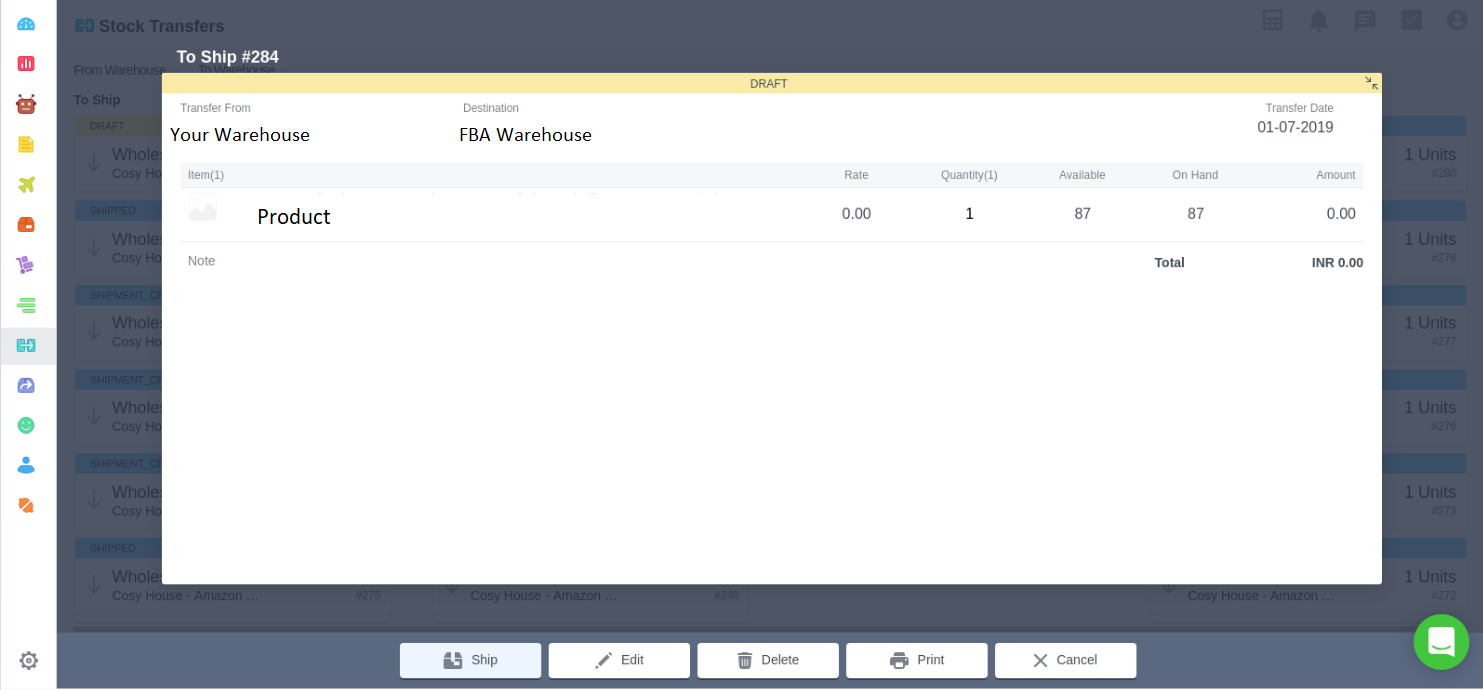
- Click on SHIP to move ahead
- Here you can check the number of quantities you want to ship.
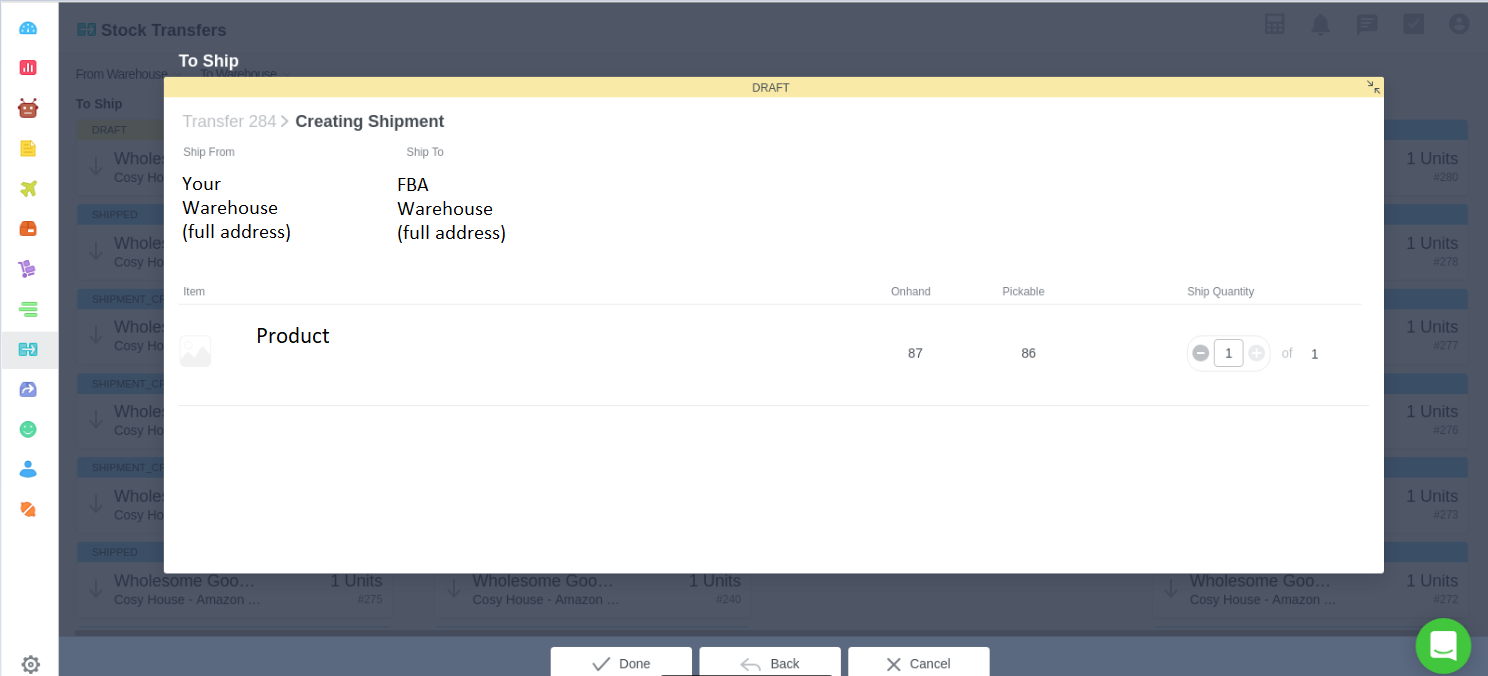
- Once you confirm, click on DONE. As soon as you click on Done, a transfer will also get created in your Amazon Seller Central account.
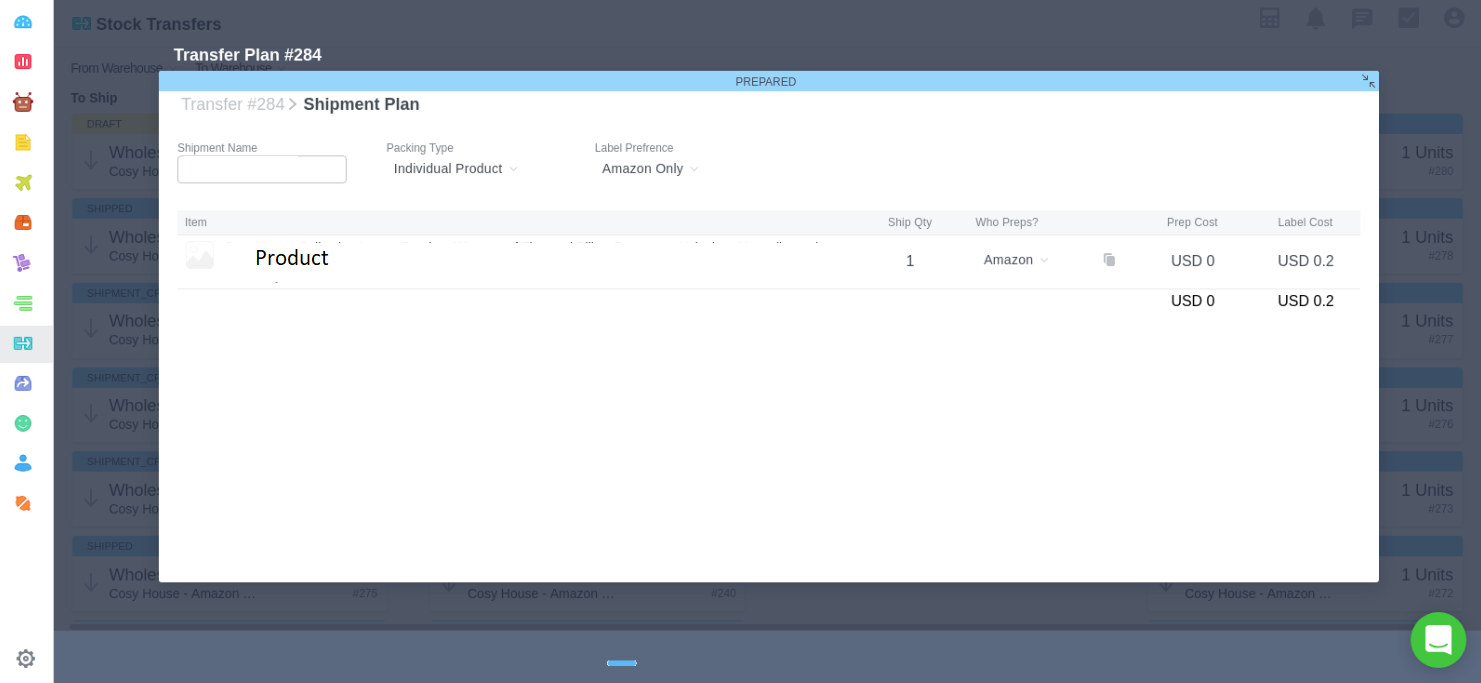
- Here you need to select from Packaging type, Label Preference & who prepares the shipment.
- Packaging Type
Individual Product : All boxes in the shipment must be individually packed.

Case Packed : Products are packed in a case. It denotes the quantity you are sending in a case (box). Fill in the field of Qty in case as per the products you are sending in each case. All boxes in the shipment must be case packed.
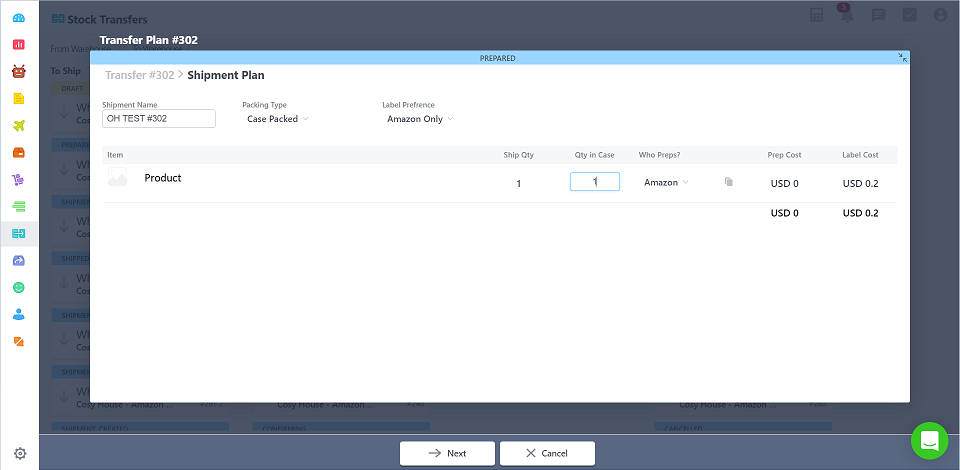
Note: A shipment must either contain all case-packed boxes or all individually packed boxes.
2. Label preference : Your preference for label preparation for an inbound shipment.
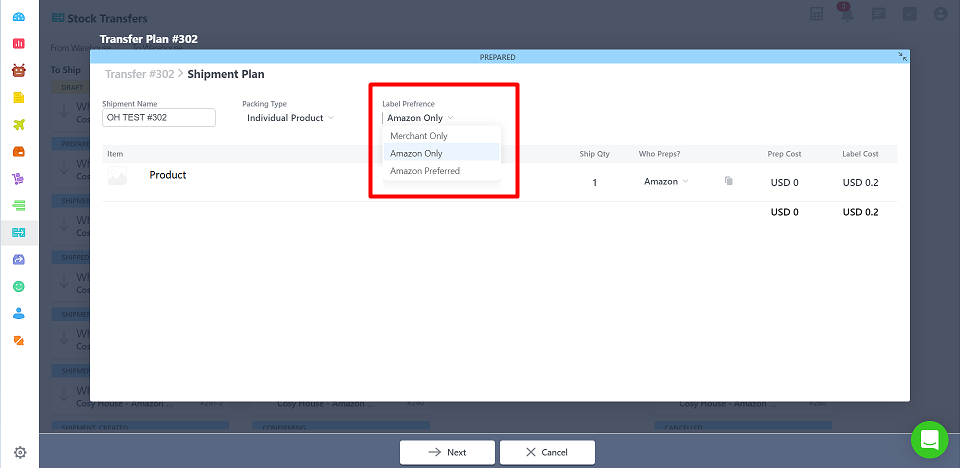
Amazon Only: Amazon attempts to label the items in the inbound shipment when labels are required. If Amazon determines that it does not have the information required to successfully label an item, that item is not included in the inbound shipment plan.
Merchant Only: Seller labels the items in the inbound shipment when labels are required.
Amazon preferred: Amazon attempts to label the items in the inbound shipment when labels are required. If Amazon determines that it does not have the information required to successfully label an item, that item is included in the inbound shipment plan and the seller must label it.
Note: Unless you have enrolled in the FBA Label Service, Merchant Only is the only valid Label Preference value. The FBA Label Service is not available in China (CN) or India (IN) and is currently in beta development in Japan (JP). For more information about the FBA Label Service, see the Seller Central Help for your marketplace.
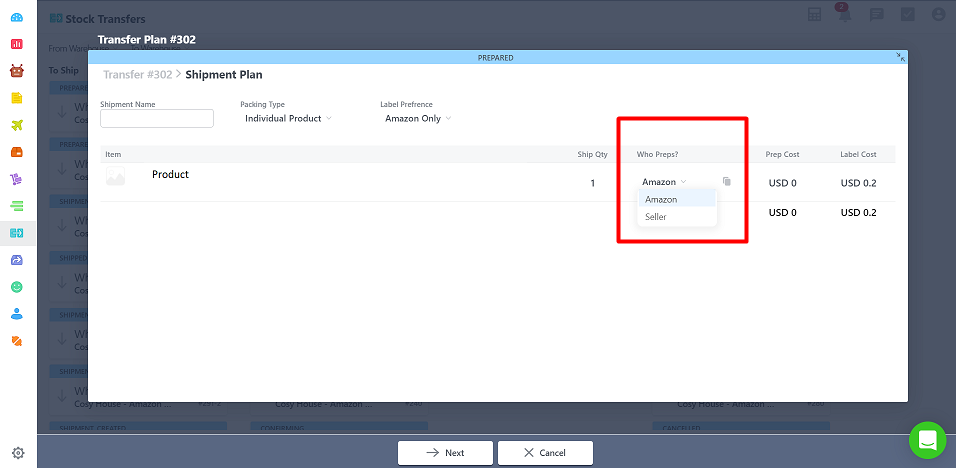
3. Who Preps?
Preparation instructions for shipping an item to Amazon's fulfillment network.
- Amazon (The similar charge would be taken by Amazon)
- Seller
Label Cost - This indicates the cost of the label that needs to be purchased based on the originating address and the destinationton.
- Once your done, click on Next.
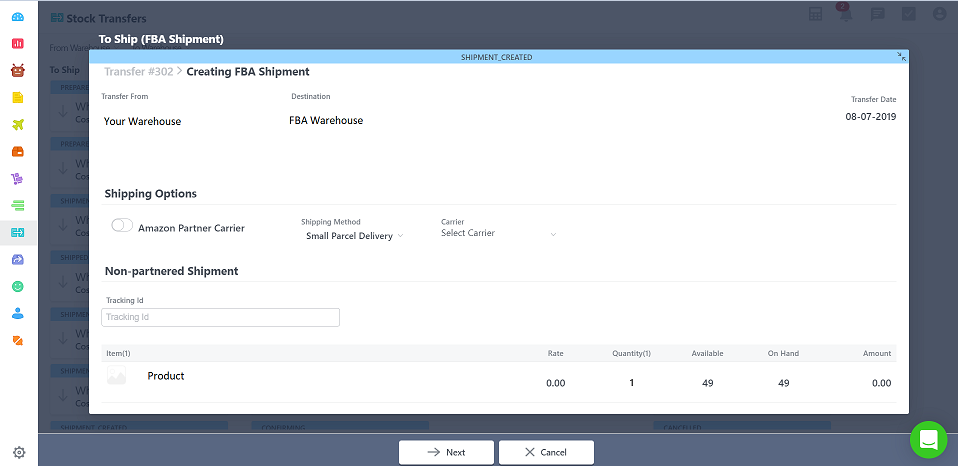
- Amazon Partner Carrier(Off) : Here, you need to select the shipment Method and the carrier through which you are sending the shipment to FBA. Also, input the tracking ID of the shipment .
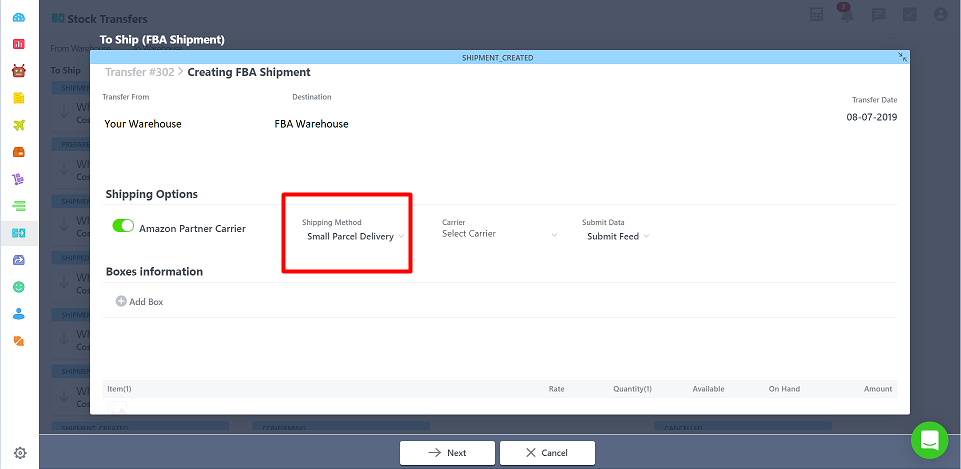
Amazon Partner Carrier(ON): Here, you need to select the shipment Method, carrier and submit feed in which you are sending the shipment to FBA.
Shipment Method: They are 2 types of shipment method - Small Parcel Delivery & Less than/Full Truck Load
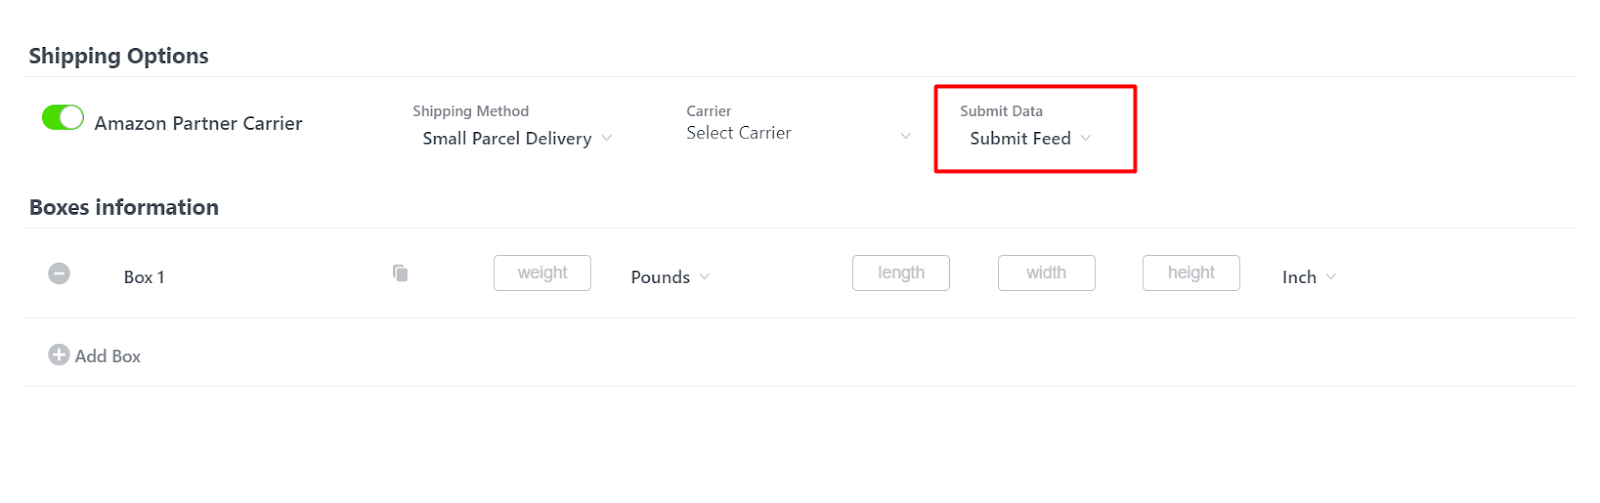
Small Parcel Delivery - This shipment is just a parcel delivery where Amazon partner carrier picks the shipment from warehouse. Also you need to select the no. of boxes you are sending. A maximum limit upto 15 boxes can be added from the UI itself. If the number is bigger than 15 then it needs to be uploaded through an excel file. The template of the excel file is available to download. You need to input the height, width, length & weight of the box
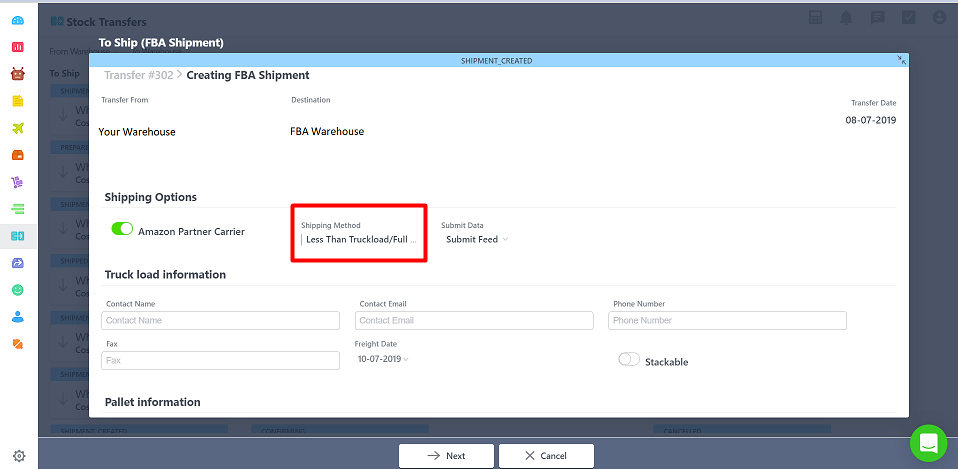
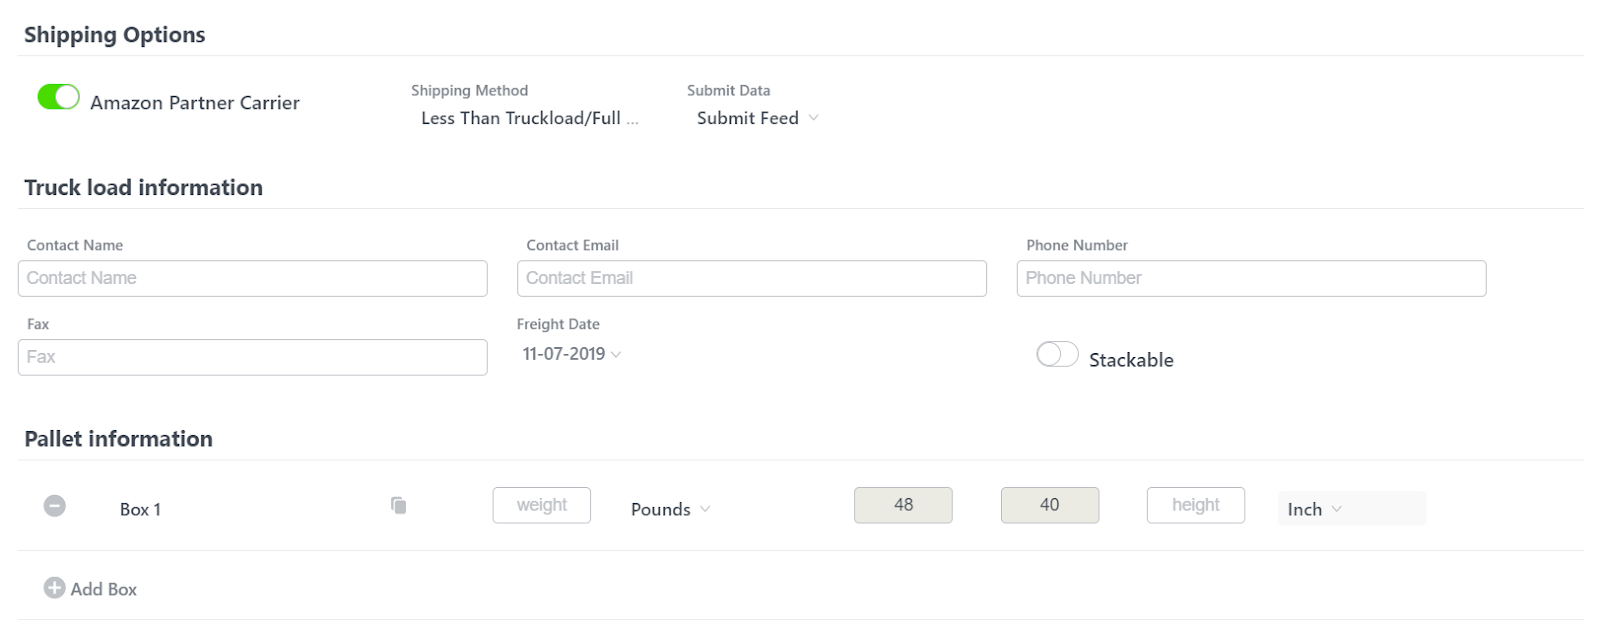
Less than/Full Truck Load - This shipment is considered to be big enough which would require a truck to be transported. You also need to feed in the Truck Load information. Also you need to select the no. of boxes you are sending. A maximum limit upto 15 boxes need to be added from the UI itself. Here, the size of the boxes have a fixed value for length(48) & width(40). You need to input the height and weight of the box.
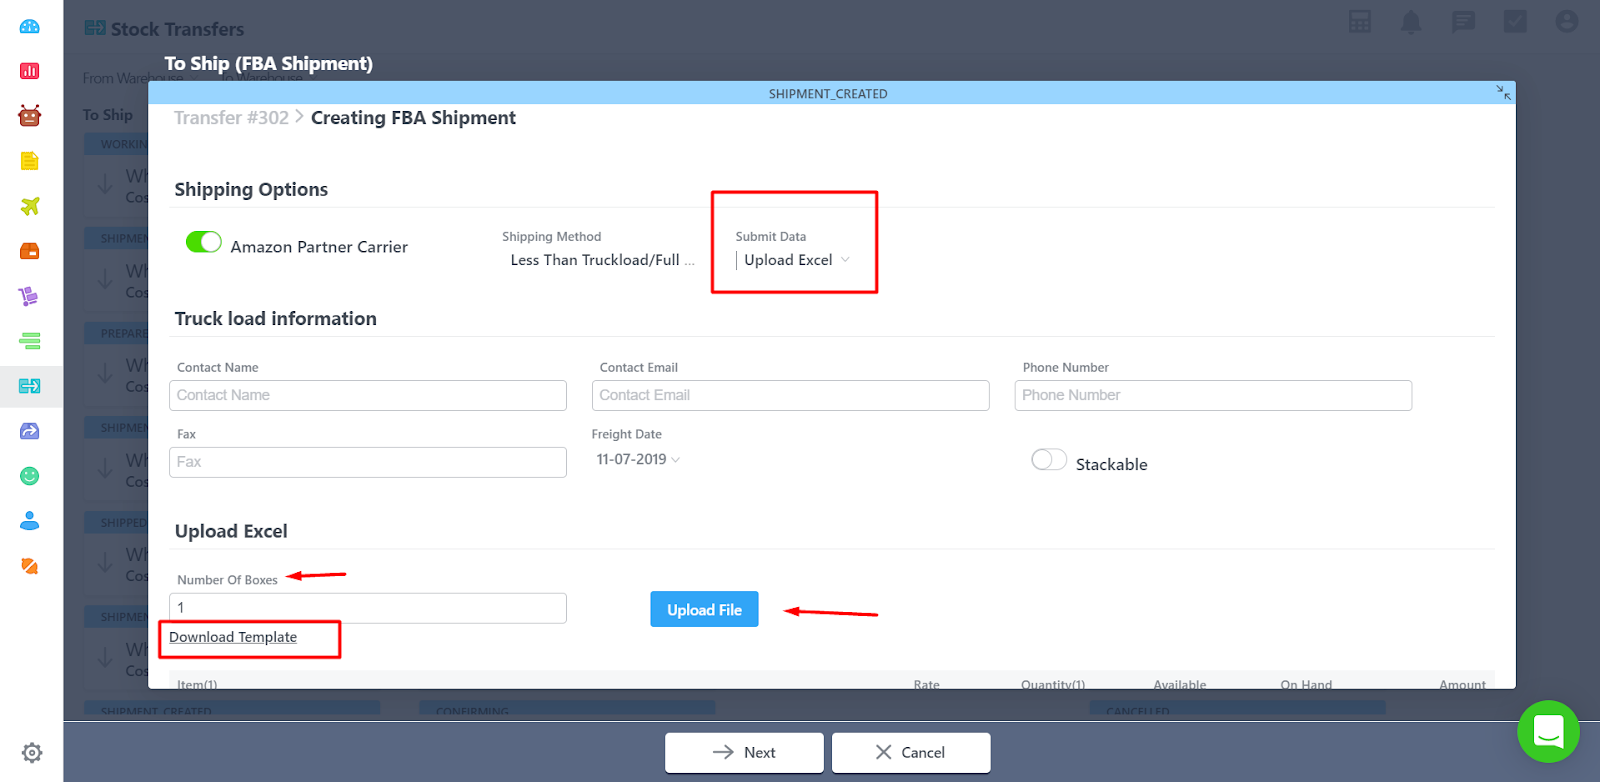
For boxes greater than 15:
If the number of boxes is bigger than 15 then it needs to be uploaded through an excel file. The template of the excel file is available for download.
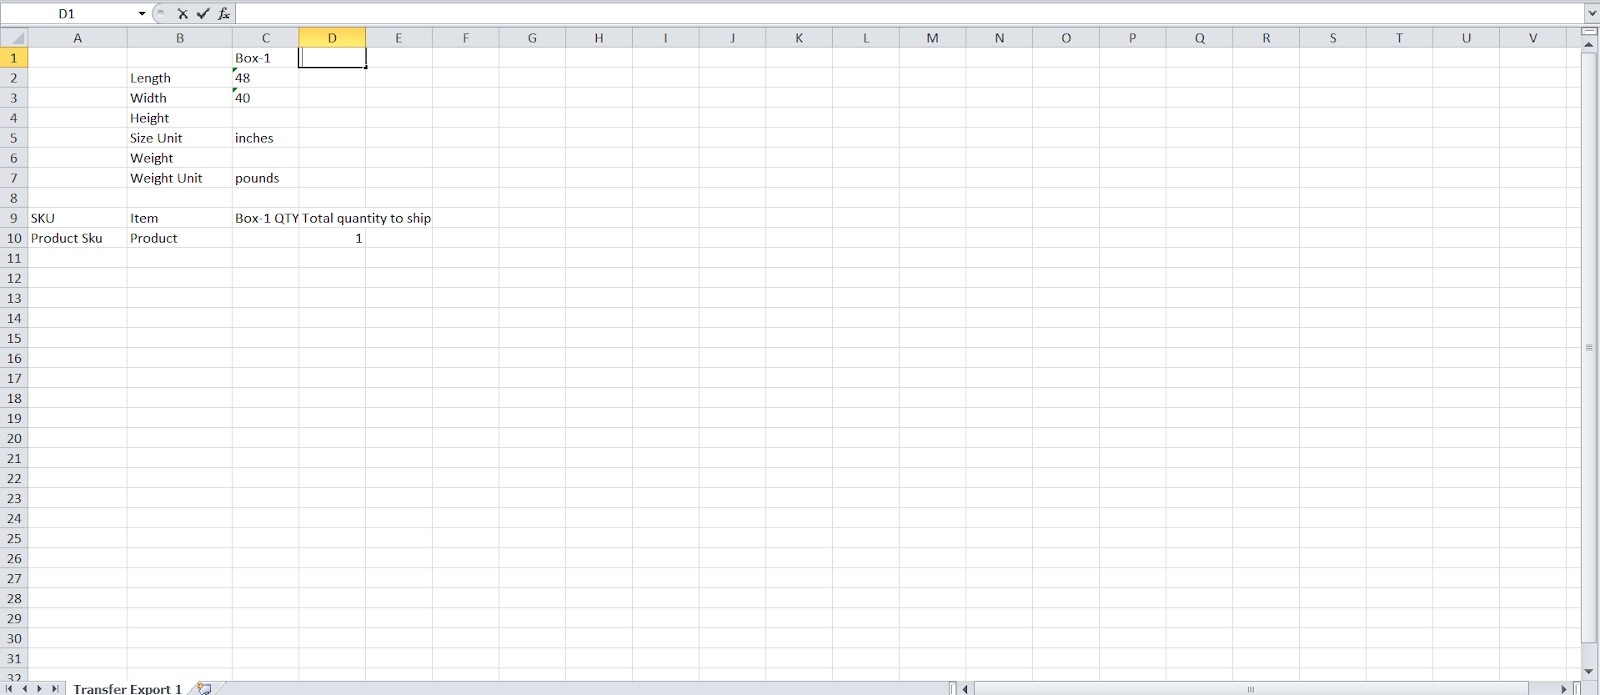
Below is the template of the Excel which you need to upload
- Once you are done, click on next.
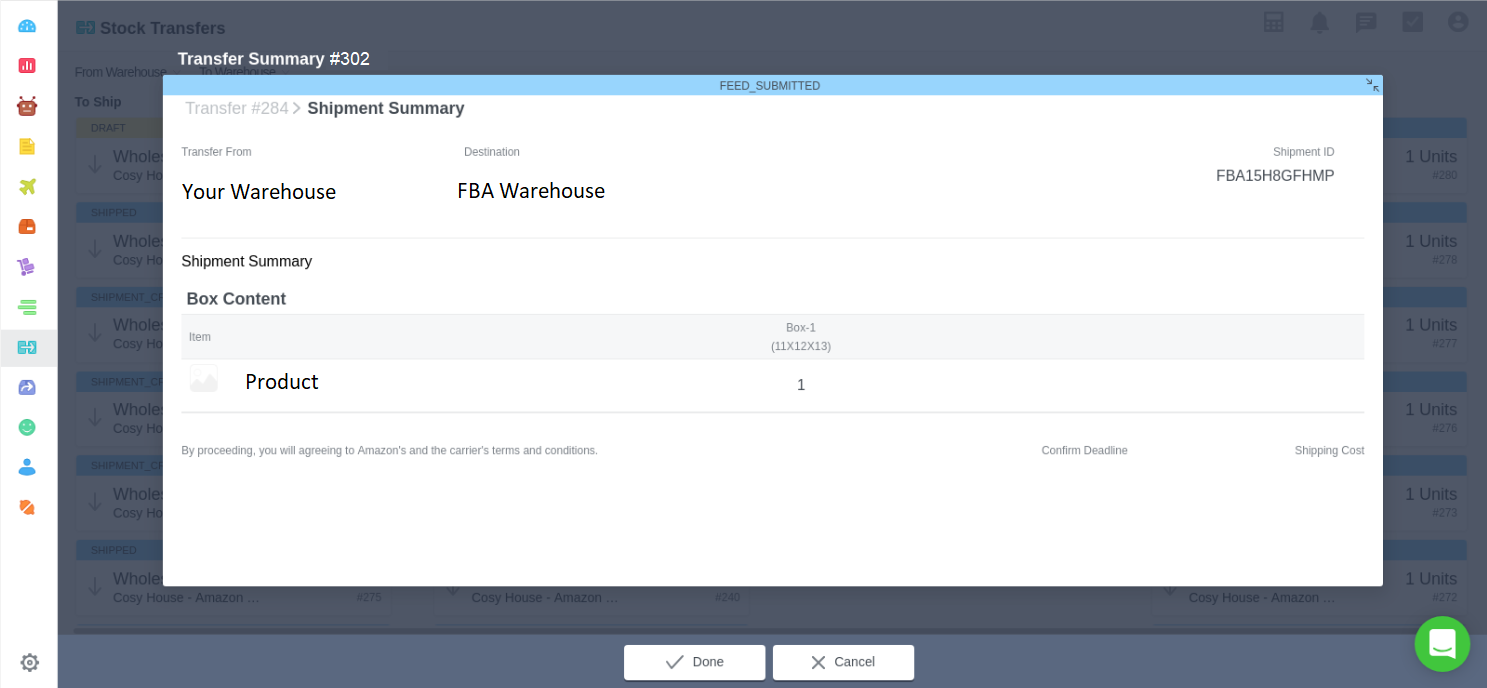
- In the next page a shipment ID would be created. Check the same in the Amazon Seller Central Account.
- Click on Done to further process the stock transfer. This will move the stock transfer to AWAITING RECEIPT column.
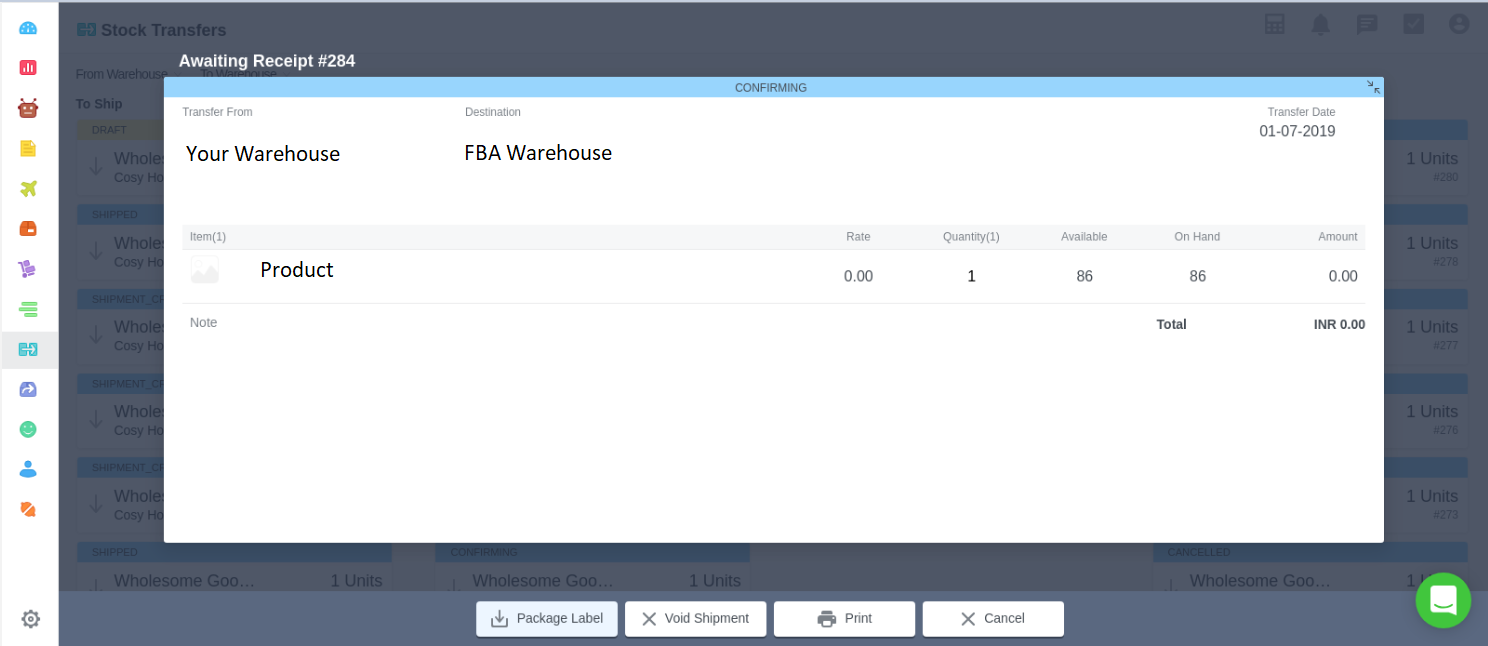
- Package Label : You can download the label for the shipment
- Void shipment : You can void the shipment which will void the shipment in Amazon Seller Central.
- Once you Void the shipment you can cancel the shipment from OH which will also cancel the shipment in Amazon seller Central.
Note: You can void a shipment only within 1 hour from the time of creation for Truck Load Transfer , for Small Transfer it is 24 hours.

- Print : You can then print the Label for the shipment
Not getting what you need? Chat with our product expert immediately.